How to Edit Twitch Clips for TikTok and YouTube Shorts (2026)
Twitch Editing
There are a lot of different ways of to edit twitch videos and twitch clips. There is no wrong way to edit twitch clips for YouTube or TikTok. But, some twitch clip editors are easier than others.
The hard way
- Download your twitch clip from a random online tool
- Download a full video editor like Davinci Resolve
- Follow a tutorial video like this to do all the editing by hand
- Export the video
- Manually upload the clip to TikTok and YouTube shorts
- Repeat for every single twitch clip you want to edit
The easy way
- Download a twitch clip editor like Clipbot.tv
- Pick your favorite clips and let Clipbot make the videos vertical magically
- Let Clipbot process the clips, upload them to YouTube Shorts, and publish them to TikTok overnight
For this article we'll be showing how to edit with Clipbot, since it's the most automatic tool for editing twitch clips for TikTok and YouTube.
How to Edit Twitch Clips with Clipbot
Clipbot is not only a Twitch Clip Editor, but also an uploader. It automates processing, YouTube uploads, and TikTok publishing without you pressing a button. There are two main ways to edit Twitch clips with Clipbot - automatically and manually.
Method 1: Automatically Edit And Upload Twitch Clips
- In order to use Clipbot, head to Clipbot.tv and hit "Start growing my channel" to download the tool.
- Follow the setup instructions to login to TikTok and YouTube.
- On the main screen, select Auto Crop
Auto Crop is Clipbot's tool for automatically editing twitch clips to TikTok + YouTube shorts format. While using Auto Crop, you'll only need to set crops once and Clipbot will crop all your clips like that automatically.
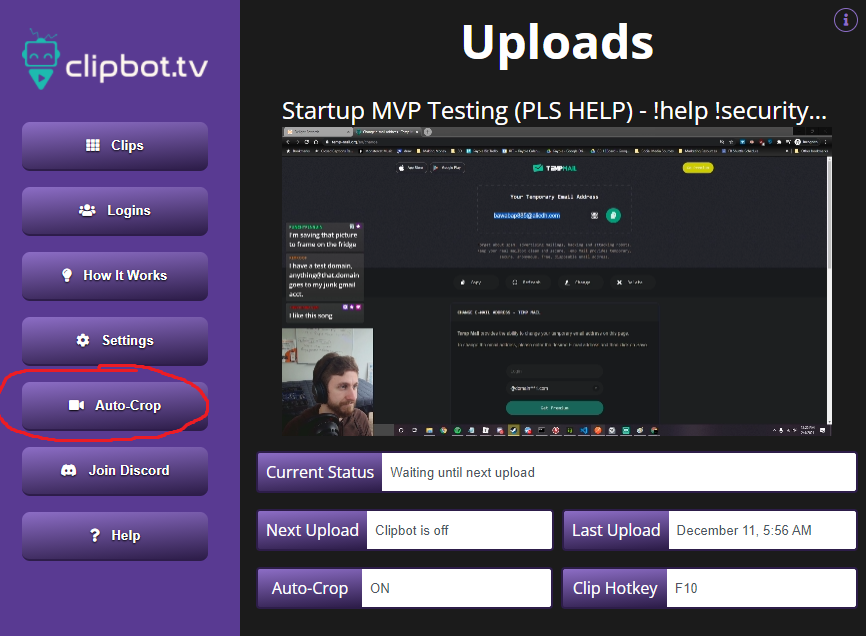
- Turn on Auto Crop
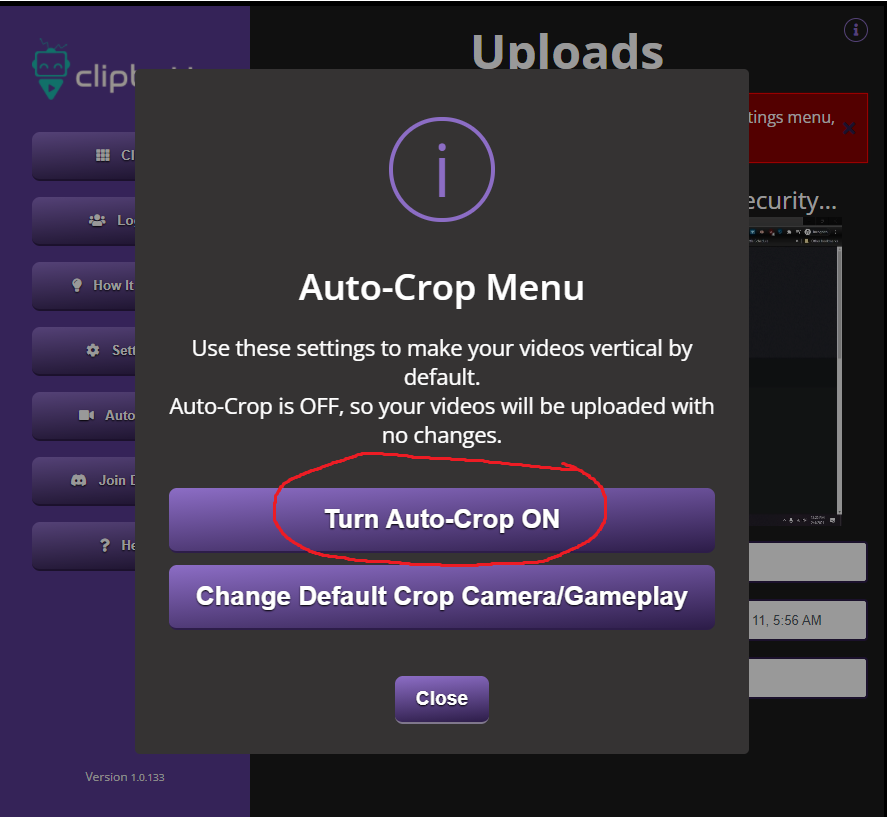
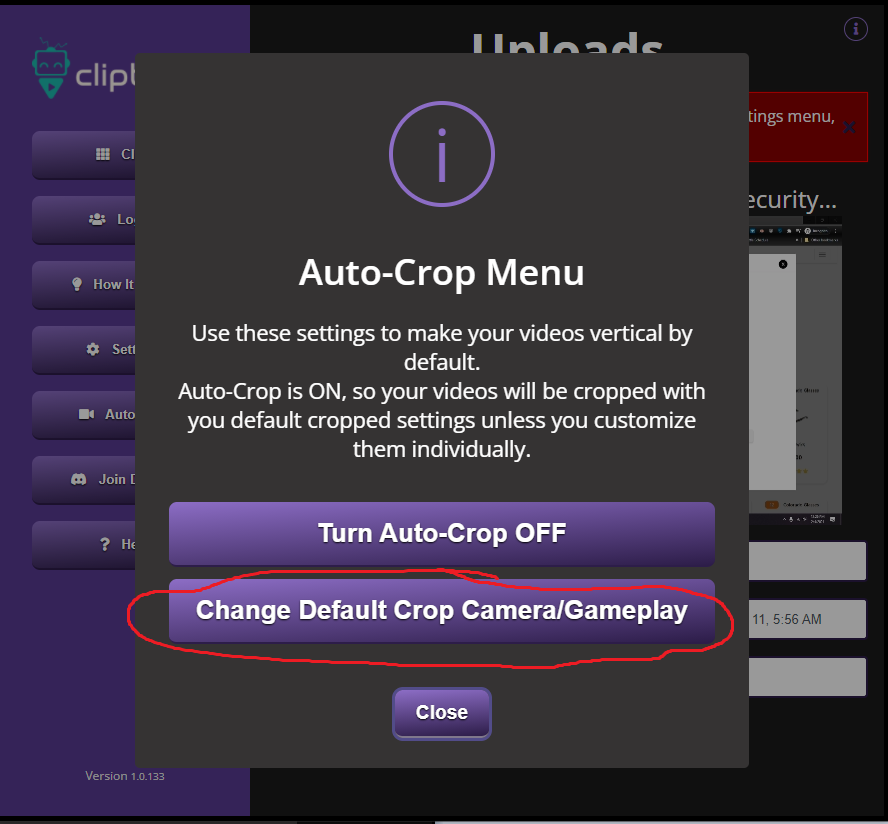
- Select "Change Default Crop Camera/Gameplay"
This means we're going to choose what our default clip will look like when it gets automatically edited.
- Choose your preferred crop type (cam or no-cam)
The final product will look like the left or right image depending on what you pick, so choose carefully!
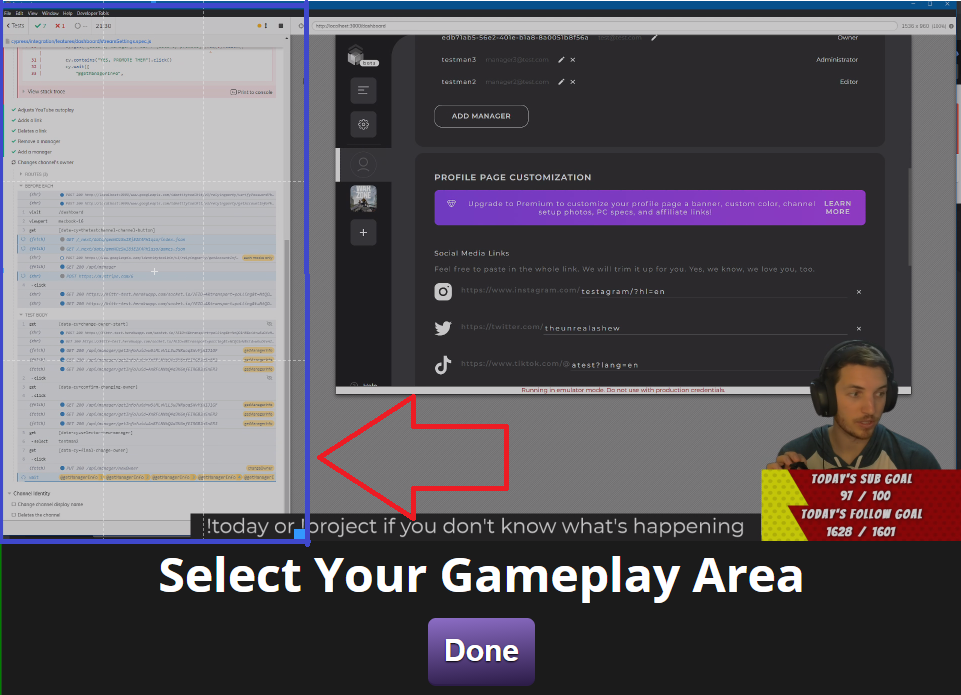
- Select what regions of the screen you want to become your clips!
These segments will have defined ratios to make sure they look good on mobile, so be sure to grab as much of the screen as you can for higher quality twitch clip edits!
- You're done!
From here, just pick what clips you want to get uploaded, and Clipbot automatically applies your default crop settings, uploads to YouTube, or publishes to TikTok overnight. Make sure to approve clips that will work with the auto crop settings you made, or add custom crops to any Twitch clips that don't fit the auto crop that you want to upload.
Method 2: Manually Edit Twitch Clips with Clipbot
- In order to use Clipbot, head to Clipbot.tv and hit "Start growing my channel" to download the tool.
- Follow the setup instructions to login to TikTok and YouTube.
- On the main screen, select Clips
The Clips menu is where you'll find all of your Twitch Clips to edit and upload. Approve a clip, and Clipbot handles the YouTube upload or TikTok publishing. You can also edit Twitch clips here to format them better for mobile platforms.
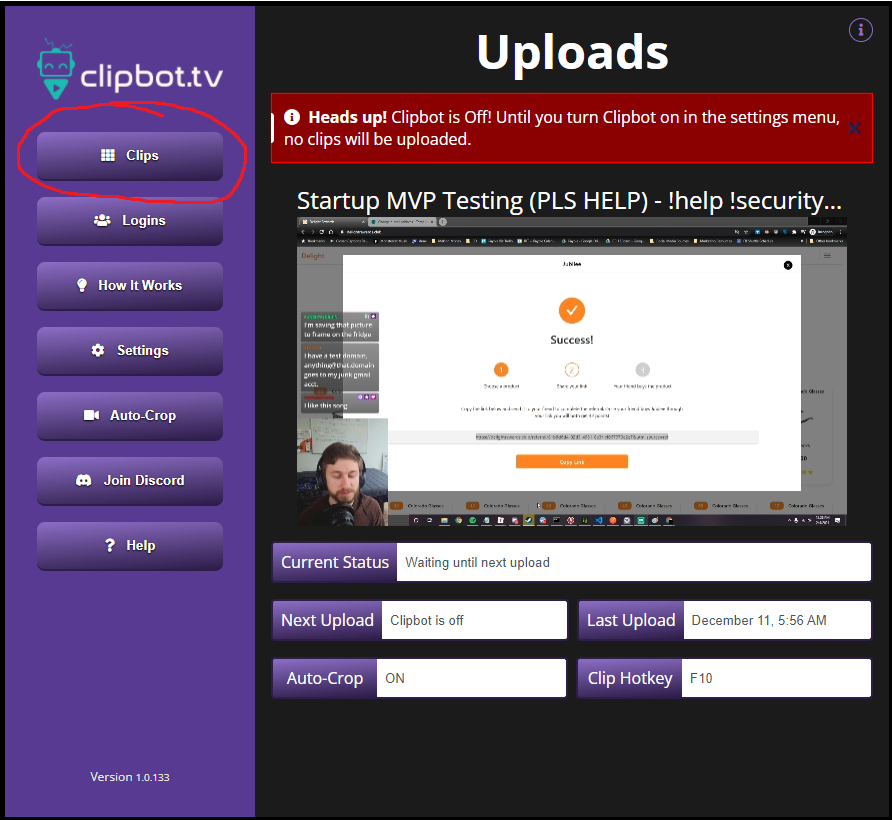
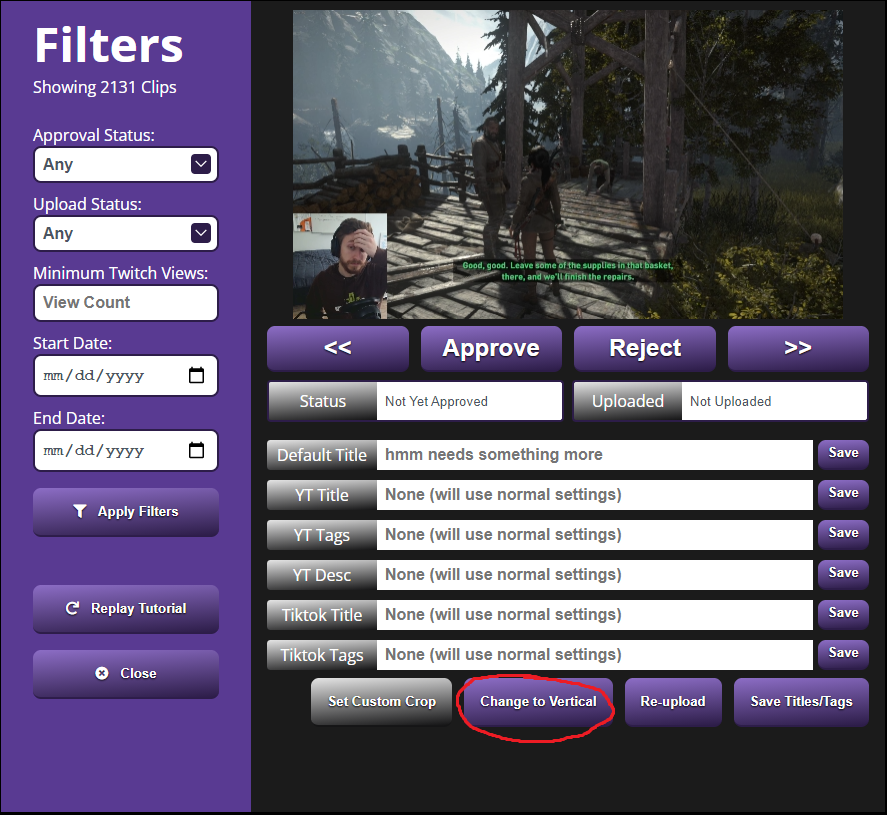
- Find your favorite clip (use << and >> arrows to scroll)
- Click "Change to Vertical"
This will take us through the process to make a mobile-ready video! Just two quick clicks and Clipbot will have our twitch clip ready to edit into a TikTok or YouTube short.
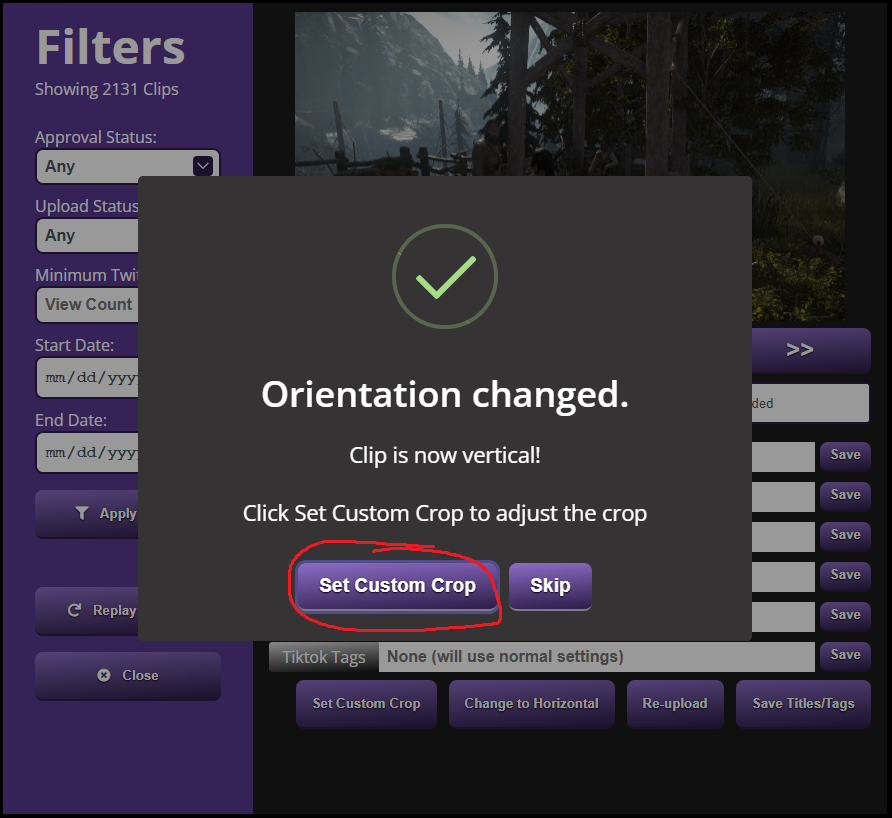
- Click "Set Custom Crop"
If you have an auto crop set, you can choose to skip this if you'd like. But if you want each clip to be different, you should set this every time.
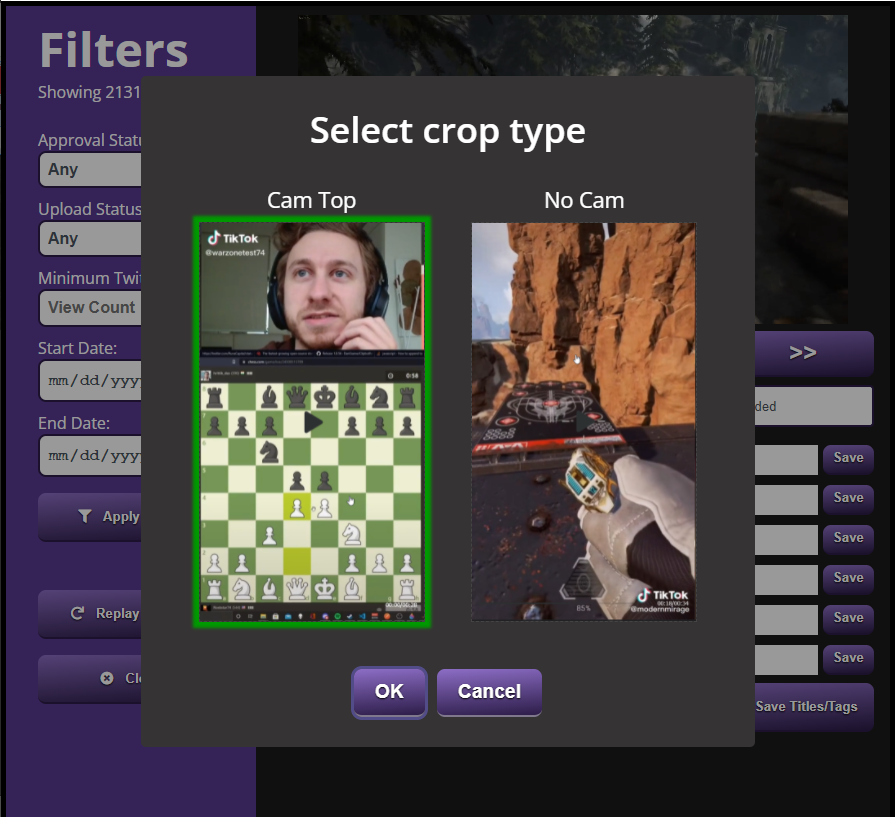
- Choose your preferred crop type (cam or no-cam)
The final product will look like the left or right image depending on what you pick, so choose carefully!
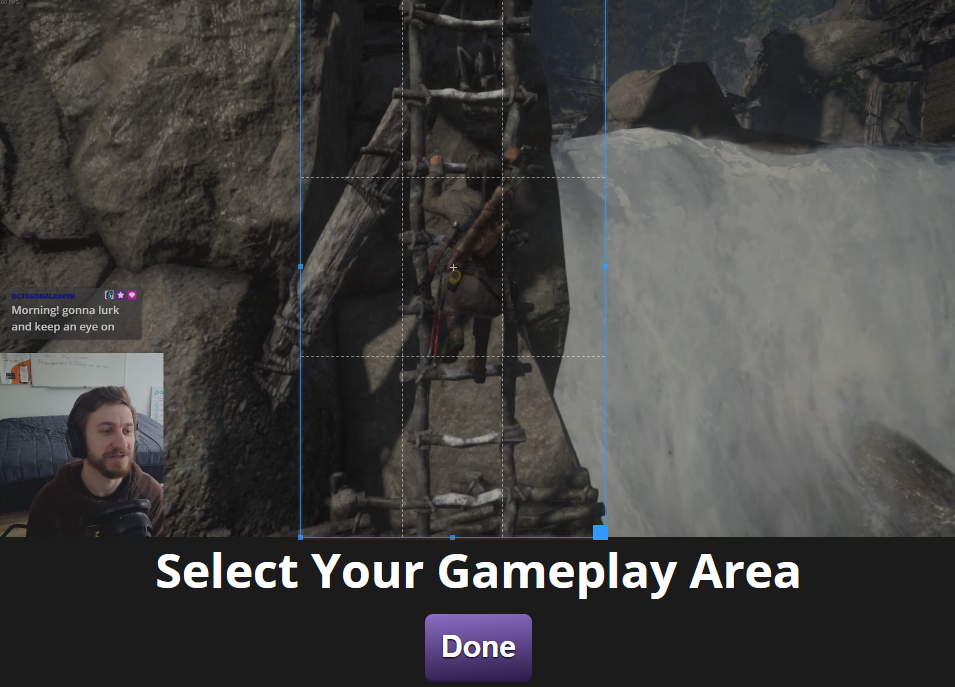
- Select what regions of the screen you want to become your clips!
These segments will have defined ratios to make sure they look good on mobile, so be sure to grab as much of the screen as you can for higher quality twitch clip edits!
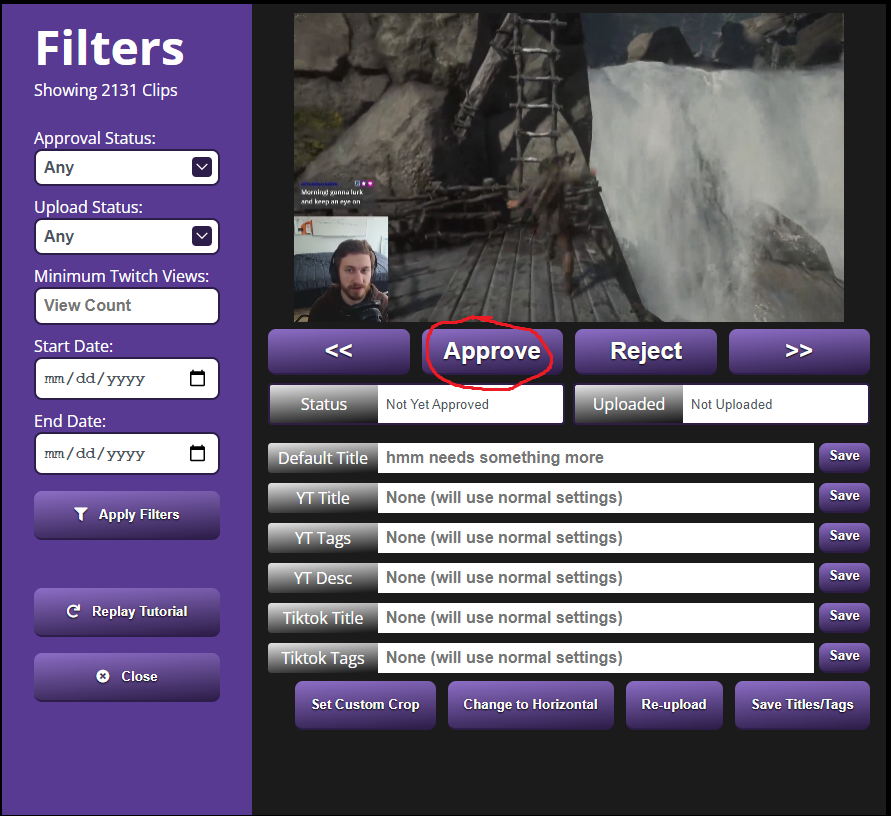
- Approve the clip!
From here, repeat the process! Edit any Twitch clip into TikTok or YouTube Shorts format, and Clipbot will upload the clip to YouTube and publish it to TikTok automatically overnight.
Clipbot is free to use for any streamers below 2000 followers on Twitch, and only $5/month for larger streamers. It handles the repetitive editing and upload work, so try it out today
Related Guides
Looking for more ways to work with Twitch clips? Learn how to make clips on Twitch with chat commands and Stream Deck buttons, or set up a Nightbot clip command so viewers can create clips during your stream. Once your clips are edited and uploaded, discover why YouTube Shorts may be better than TikTok for growing your audience.
If you're comparing tools, check out our Combo vs Clipbot comparison to see editing power versus upload automation, or read our Powder vs Clipbot review for another automation alternative.
Frequently Asked Questions
How do I edit Twitch clips for TikTok and YouTube Shorts?
You can edit Twitch clips manually using video editors like DaVinci Resolve, or automate the process with Clipbot. Clipbot crops clips vertically for mobile platforms, handles aspect ratio conversion, adds captions, and uploads to TikTok and YouTube Shorts overnight without manual editing. The manual method requires downloading clips, editing in software, exporting, and uploading separately for each platform.
What is the easiest way to edit Twitch clips for vertical video?
Clipbot's Auto Crop feature is the easiest way to edit Twitch clips for vertical video. Set your default crop settings once for cam and gameplay regions, then Clipbot automatically applies those crops to all approved clips and uploads them to TikTok and YouTube Shorts. This eliminates repetitive manual editing and ensures consistent mobile-optimized formatting across all your clips.
Can Clipbot automatically edit and upload my Twitch clips?
Yes. Clipbot automatically crops your clips to vertical format, processes them overnight, uploads to YouTube Shorts, and publishes to TikTok. You approve clips and set crop preferences; Clipbot handles editing, upload, and publishing while you sleep. You can set custom titles, hashtags, and descriptions for each clip or use default settings for all uploads.
Do I need video editing skills to use Clipbot?
No. Clipbot requires no video editing experience. Choose your preferred crop type (cam or no-cam), select regions of the screen you want to capture, and Clipbot handles aspect ratio, mobile optimization, and uploads. Advanced users can set custom crops per clip if desired, but the default settings work for most streamers.
How does Clipbot Auto Crop work for Twitch clips?
Auto Crop lets you define default crop settings for cam and gameplay once. Clipbot then applies those settings automatically to all approved clips, converting them to vertical format optimized for TikTok and YouTube Shorts. This saves hours of repetitive editing work. You can still set custom crops for individual clips that don't fit your default layout.
Is Clipbot free for small streamers?
Yes. Clipbot is free for streamers below 2000 Twitch followers. Larger streamers pay $5 per month. Clipbot handles automated editing, YouTube uploads, and TikTok publishing for all users regardless of plan.